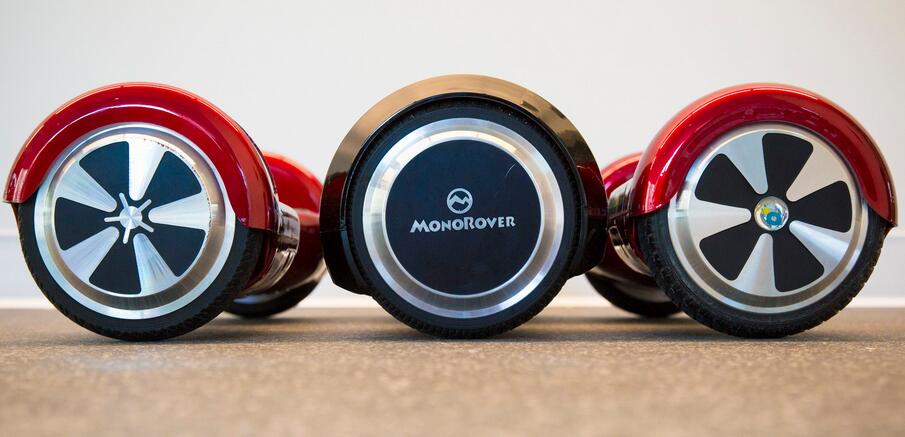
If you own a hoverboard, you might be wondering how long it takes to fully charge. The answer depends on several factors, such as the type of hoverboard, the battery capacity, and the charger’s output. In general, most hoverboards take between 2 to 4 hours to charge fully, but fast-charging models can take as little as 1 hour.
The charging time for hoverboards can vary depending on the battery’s capacity. For example, hoverboards with a battery capacity of around 4,000 mAh usually take between 2 to 4 hours to charge fully.
However, if your hoverboard has a larger battery capacity, it may take longer to charge. It’s important to note that you should always use the charger that came with your hoverboard, as using a different charger can damage the battery and cause safety hazards.
To ensure that your hoverboard’s battery lasts as long as possible, it’s important to follow the manufacturer’s instructions for charging. Most hoverboards come with a charger that has an output of 42 volts and 2 amps, but some models may require a different charger.
Additionally, you should avoid overcharging your hoverboard, as this can also damage the battery. By following these guidelines, you can ensure that your hoverboard is always ready to ride when you are.
Table of Contents
Types of Hoverboard Batteries
Lithium-ion batteries are the most common type used in hoverboards. They are lighter, more energy-dense, and have a longer lifespan than lead-acid cells. Lithium-ion batteries also have a faster charging time and are less prone to self-discharge. However, they are more expensive than lead-acid cells.
Lead-acid cells are heavier, less energy-dense, and have a shorter lifespan than lithium-ion batteries. They also have a slower charging time and are more prone to self-discharge. However, they are less expensive than lithium-ion batteries.
Battery Capacity and Lifespan
Hoverboard batteries come in different capacities, typically ranging from 4,000 mAh to 10,000 mAh. The battery capacity determines how long the hoverboard can run on a single charge. The lifespan of a hoverboard battery depends on several factors, including the quality of the battery, how often it is charged, and how it is used.
To extend the lifespan of your hoverboard battery, it is recommended that you charge it before it reaches 20% capacity and avoid overcharging it. It is also important to store your hoverboard in a cool, dry place when not in use, as high temperatures can shorten the lifespan of the battery.
How Long Does it Take to Charge a Hoverboard for the First Time?
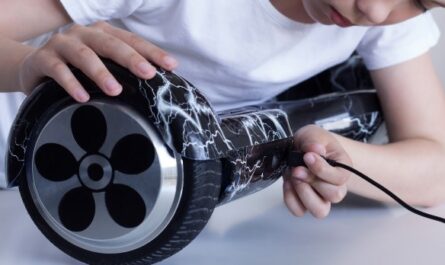
When you first get your hoverboard, it is important to give it an initial charge before using it. This will help to ensure that the battery is fully charged and ready to go. To do this, simply plug your hoverboard into the charger using the charging port and the original charger that came with it. The charging port is usually located at the bottom of the hoverboard.
The initial charging time for a new hoverboard can vary depending on the model and battery capacity. On average, it takes around 2 to 3 hours to charge a hoverboard for the first time. It’s important to note that this is an estimated time, and it may vary slightly.
Standard charging time (2-4 hours)
After the initial charge, you can charge your hoverboard as needed. To do this, simply plug it into the charger using the charging port and the original charger that came with it. The charging time for hoverboards can vary depending on the model and battery capacity.
Most hoverboards take between 2-4 hours to fully charge. It is important to note that you should not leave your hoverboard charging for more than 4 hours. This can damage the battery and reduce its lifespan.
Factors Affecting Charging Time
Several factors can influence the time it takes for a hoverboard to charge:
- Battery Capacity: The larger the battery capacity, the longer it will take to charge. Hoverboards with higher battery capacities can provide longer ride times but may require more time to charge fully.
- Charger Power Output: The charger’s power output plays a significant role in the charging time. Higher power output chargers can deliver more energy to the battery, reducing charging time. It is recommended to use the charger provided by the manufacturer for optimal results.
- Temperature: The ambient temperature can affect the charging time of a hoverboard. Extreme temperatures, both hot and cold, can slow down the charging process. It is advisable to charge your hoverboard in a moderate-temperature environment.
- Hoverboard Usage Patterns: How often you use your hoverboard and the duration of each ride can impact the charging time. If you frequently use your hoverboard and deplete the battery, it will take longer to charge fully.
It is important to note that charging times can vary between different hoverboard models and brands. Always refer to the manufacturer’s guidelines for specific charging instructions.
How do you know if your hoverboard is fully charged?
To determine if your hoverboard is fully charged, you can look for certain indicators or follow specific guidelines provided by the manufacturer. Here are some common methods to know if your hoverboard battery is fully charged:
- Charging Indicator Light: Most hoverboards have LED indicator lights that display the charging status. Typically, when the hoverboard is fully charged, the indicator light will turn green. Before reaching a full charge, the light may be red or another color.
- Charging Time: The estimated charging time provided by the manufacturer can give you an indication of when your hoverboard should be fully charged. Once the expected charging duration has elapsed, your hoverboard will likely be fully charged. However, it is still recommended to check the charging indicator light to confirm.
- Battery Level Display: Some hoverboards have built-in battery level displays, either as a digital display or a series of LED lights. When the battery level reaches 100% or the highest level indicated on the display, it suggests that your hoverboard is fully charged.
Tips for Faster Charging
If you want to enjoy a longer ride on your hoverboard, it’s important to take care of the battery. Here are some tips for enhancing battery performance:
- Use the right charger: Make sure you’re using the charger that came with your hoverboard, or a compatible one. Using the wrong charger can damage your battery and decrease its lifespan.
- Charge at the right time: Don’t wait until your battery is completely drained before charging. Instead, try to charge your hoverboard when the battery is at around 20-30% capacity. This can help extend the lifespan of your battery.
- Avoid overcharging: Once your hoverboard is fully charged, unplug it from the charger. Overcharging can damage the battery and reduce its lifespan.
- Keep it cool: Avoid charging your hoverboard in direct sunlight or a hot environment. High temperatures can damage the battery and decrease its lifespan.
Troubleshooting Common Issues
If you’re having trouble charging your hoverboard, there are a few common issues that you can troubleshoot to get your board back up and running.
1. Charging Indicator Problems
One common issue that can arise when charging your hoverboard is problems with the charging indicator light. If the light isn’t turning on when you plug in your charger, there may be an issue with the charger itself or with the charging port on your hoverboard.
To troubleshoot this issue, try plugging your charger into a different outlet to make sure that the outlet isn’t the problem. If that doesn’t work, try using a different charger if you have one available. If neither of these solutions works, you may need to have your charging port repaired or replaced.
2. Hoverboard Not Charging
Another common issue that can arise when charging your hoverboard is that it simply won’t charge. If this is the case, there are a few things that you can try to troubleshoot the problem.
First, make sure that your hoverboard is turned off when you’re charging it. If it’s turned on, it may not charge properly. Second, check to make sure that your charger is plugged in all the way and that the charging port is clean and free of debris. Finally, try using a different charger if you have one available to see if that solves the problem.
If none of these solutions work, there may be a more serious issue with your hoverboard’s battery or charging system. In this case, it’s best to take your hoverboard to a professional repair shop to have it looked at.
Alternative Ways to Charge a Hoverboard
If you’re curious about other ways to charge your hoverboard, such as using different chargers or charging without a charger, click here to learn more and expand your knowledge on this topic.
1. Using other chargers
If you’re considering using a different charger for your hoverboard, it’s crucial to be cautious. Only use chargers that are specifically designed for hoverboards and match the voltage and current requirements of your device.
Using an incompatible charger can lead to overcharging, damaging the battery, or even causing safety hazards such as fire or electric shock. To ensure the longevity and safety of your hoverboard, always stick to the original charger provided by the manufacturer.
In case you’ve lost or damaged your original charger, it’s best to reach out to the manufacturer or an authorized dealer to purchase a suitable replacement. Trying to use other chargers not specifically meant for hoverboards can pose serious risks and may end up being more costly in terms of repairs or replacements in the long run.
2. Charging without a charger
If you find yourself without a charger for your hoverboard, there are alternative ways to power it up. One option is using a portable power bank with the appropriate voltage and current output to recharge your hoverboard.
Another method is utilizing a car charger that matches the specifications of your hoverboard’s battery. It’s crucial to ensure that any alternative charging method aligns with the technical requirements of your hoverboard to prevent damage or safety hazards.
Remember, using unauthorized chargers or methods may lead to battery issues and safety risks, so always prioritize using the manufacturer-recommended charger whenever possible.
How To Extend The Battery Life Of Your Hoverboard Battery?
By following these tips and best practices, you can extend the lifespan of your hoverboard battery and optimize its performance.
1. Charge Regularly
One of the most important factors in maintaining battery health is to charge your hoverboard regularly, even if you don’t use it frequently.
Lithium-ion batteries, commonly found in hoverboards, prefer to be charged in a partially charged state rather than being fully depleted. Aim to charge your hoverboard at least once every few weeks to prevent the battery from becoming completely drained.
2. Avoid Overcharging
While regular charging is essential, it is equally important to avoid overcharging your hoverboard battery. Overcharging can lead to battery degradation and decreased performance over time. Once your hoverboard battery is fully charged, unplug it from the charger to prevent overcharging.
3. Store in Optimal Conditions
Proper storage of your hoverboard can also contribute to extending the battery life. When not in use, store your hoverboard in a cool, dry place.
Avoid exposing it to extreme temperatures or direct sunlight, as these conditions can negatively impact battery performance. Storing your hoverboard in optimal conditions helps maintain the battery’s overall health and longevity.
4. Update Firmware
Check for firmware updates provided by the manufacturer. Firmware updates often include improvements to battery management, optimizing charging processes, and enhancing overall battery performance.
Keeping your hoverboard’s firmware up to date ensures that you are benefiting from the latest battery optimization features provided by the manufacturer.
5. Avoid Overexertion
While hoverboards are a fun mode of transportation, try to avoid pushing the battery to its limits by continuously riding for extended periods.
Giving your hoverboard battery time to rest and cool down between rides can help prevent excessive strain on the battery cells. Prolonged and continuous riding without breaks can lead to increased heat buildup, which can negatively impact battery performance and lifespan.
Other Frequently Asked Questions
1. Can You Use a Hoverboard While It’s Charging?
No, it is not recommended to ride a hoverboard while it is charging. Charging your hoverboard requires a stable power source, and riding it during this time can lead to potential safety hazards and damage to the hoverboard.
2. What Indicators Show a Hoverboard Is Charging?
Most hoverboards have LED indicators that provide information about the charging status. A common indicator is a red light, which indicates that the hoverboard is charging. Once the battery is fully charged, the indicator light typically turns green.
3. Is It Safe to Leave a Hoverboard Charging Overnight?
It is not recommended to leave your hoverboard charging overnight. Continuous charging without monitoring can increase the risk of battery damage, overheating, and potential safety hazards. Once the hoverboard is fully charged, it is advisable to unplug it from the charger.
4. Can I Charge My Hoverboard With Other Chargers?
No, it is not recommended to charge your hoverboard with other chargers that are not specifically designed for your hoverboard model. Using incompatible chargers can damage the battery and pose safety risks. It is always best to use the charger provided by the manufacturer or a certified replacement charger.

