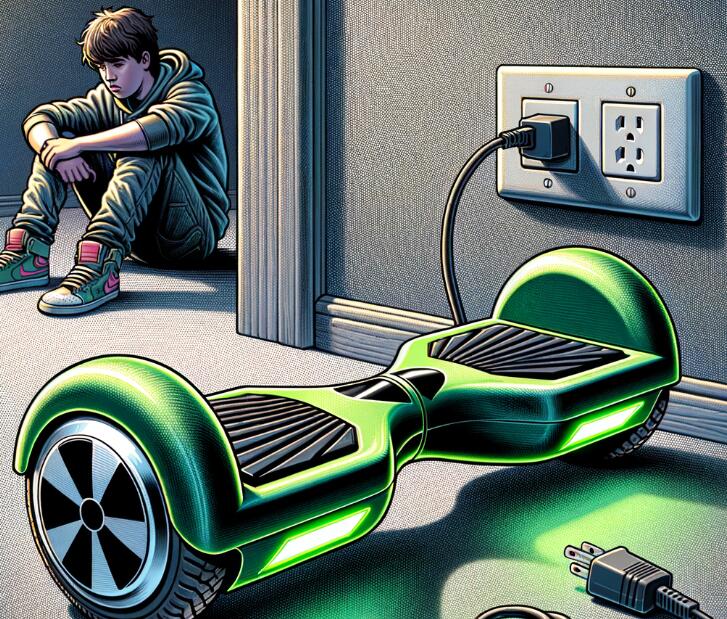
Hoverboards provide a fun and convenient way to zip around. But when your hoverboard won’t charge, it brings all the fun to a screeching halt. A non-charging hoverboard is unusable until you can get it powered up again. When your hoverboard fails to charge, it’s natural to feel frustrated and want to get it fixed as soon as possible.
The good news is that many charging problems can be solved with basic troubleshooting and repairs you can do yourself. This in-depth guide covers all the steps for troubleshooting hoverboard charging problems.
Table of Contents
Common Reasons a Hoverboard Fails to Charge
Several components work together to power up your hoverboard. If any part of this charging system is damaged or malfunctioning, it can cause charging failures. Below are the most common culprits behind a hoverboard that won’t charge.
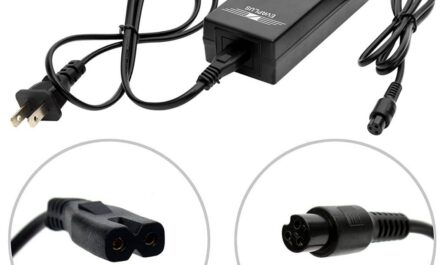
1. Faulty or Incompatible Charger
The external charger is the first thing to examine when your hoverboard won’t charge.
Chargers can fail over time due to:
- Loose or damaged cords that disrupt power delivery
- Burnt out internal components that stop current flow
- Broken circuit boards or indicators that show incorrect status
Using an incompatible or lower quality charger that doesn’t meet your hoverboard’s specifications can also cause charging problems.
2. Dead, Depleted, or Damaged Battery
Hoverboard batteries provide the power when riding and store the charge delivered by the external charger.
Over time, the battery cells and materials degrade, reducing storage capacity and ability to hold a charge. Eventually, the battery dies completely.
Batteries may stop functioning properly long before their expected lifespan for reasons like:
- Draining the battery completely too often
- Exposing battery to excessive heat or cold temperatures
- Defective manufacturing or battery components
- Physical damage to battery housing or internals
Any of these factors can cause charging failures or a hoverboard battery not holding its charge.
3. Faulty Charging Port
The charging port is the physical connection where you plug in the charger.
Charging issues can arise if the port is:
- Obstructed by debris like dirt or dust
- Physically cracked or damaged
- Suffered internal damage to the pin connectors
- Loose or disconnected from the internal wiring
Any obstruction or defect with the charging port itself can block power transfer during charging.
4. Disconnected or Damaged Wiring
The internal wires that connect the battery, logic board, and charging port must remain intact for current to flow properly.
Over time, normal wear and tear of riding can cause:
- Fraying or worn down insulation
- Broken wire connections
- Shorts or disconnects between wires
Damage to these internal wires interrupts the charging pathway.
5. Logic Board Failure
The logic board regulates power distribution and controls the other hoverboard components.
Faults with the logic board that can disrupt charging include:
- Fried circuitry from electrical shorts
- Component failure in voltage regulators
- Loose soldered connections
Since power flows through the logic board, any issues with it can prevent charging capabilities.

Step-by-Step Guide to Troubleshooting Charging Problems
When your hoverboard won’t accept a charge, methodically go through these troubleshooting steps to identify the cause:
Step 1: Inspect the Charger
The first thing to check is the external charger and its connections:
- Plug the charger into an outlet or power source. The indicator light should illuminate to confirm it is receiving power.
- If the charger light does not turn on, try switching power outlets or using another USB cord if detachable. Faulty outlets or cords can affect power delivery.
- If trying another power source or cord does not light up the charger, the issue likely lies with the charger itself malfunctioning. It will need to be replaced.
- If the charger light is on, proceed to connect it to the hoverboard.
Step 2: Evaluate Charger Connection with Hoverboard
With the charger operational, now assess its connection to the hoverboard:
- Inspect the hoverboard charging port for any obstructions like debris or damage to the metal pins. Dirt and defects can block connectivity.
- Try gently cleaning out the port with compressed air if dirty. Damaged ports will need repair.
- Firmly insert the charger head into the charging port. The prongs should slide in easily and sit flush.
- The fit should feel snug and secure when properly connected.
- Check that the charger light changes color once connected to the hoverboard, usually switching from green to red.
- If the light stays the same color rather than changing, there is an issue with the connection that is preventing charging.
Step 3: Test Battery Charge and Voltage
If the charger connection seems okay, the next likely culprit is an issue with the battery itself:
- Leave the hoverboard on the charger for several hours to ensure you allow enough time to fully recharge the battery.
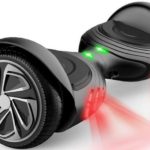
- Check the battery indicator lights on the hoverboard – a flashing red or amber light typically means low battery. Solid green means fully charged.
- Carefully remove the battery and use a voltmeter to test its voltage levels. Refer to your product specs for the proper voltage range, usually between 36-42V. Low or zero voltage confirms the battery needs replacing.
- Properly dispose of dead lithium-ion batteries, which can be fire and environmental hazards.
Step 4: Inspect Internal Components
For other issues, you may need to open up the hoverboard housing and examine the internal electronics:
- Unscrew and remove the outer shell to access the inner wiring and logic board. This typically requires a Phillips-head screwdriver.
- Check that all wiring looks intact with no fraying, stripped insulation, or disconnected wires. Follow each one visually from end to end.
- On the logic board, look for any burnt spots or discoloration from potential electrical shorts. Also examine soldered joints for cracks.
- Visually inspecting components can detect damage. Testing with a multimeter would provide further diagnosis of shorts and connectivity.
- Take care not to touch or disturb any parts that may still hold a charge.
Step 5: Contact Manufacturer Support
If you are still stumped after troubleshooting internally, reach out to the hoverboard manufacturer for assistance:
- Tell them your model and the charging symptoms you’re experiencing.
- There may be technical bulletins about known issues with your particular model that can help identify solutions.
- Ask them to walk you through any other diagnostics to confirm the problem.
- If your device is still under warranty, they should be able to arrange repair or replacement services.
- Following their prescribed troubleshooting can help substantiate a warranty claim if needed.
Solutions for Getting Your Hoverboard to Charge Again
Once you’ve zeroed in on the root cause preventing your hoverboard from charging, here are the fixes for the various issues:
1. Replacement Charger
If testing confirms the original charger is defective, replace it with a new one identical to the original charger specifications. Using lower quality or incompatible chargers can damage the hoverboard over time.
You can purchase OEM factory chargers directly through the manufacturer or authorized dealers to ensure compatibility.
2. Buy New Battery
To address a faulty or dead battery, purchase a replacement from:
- Directly through the hoverboard manufacturer
- Reputable online retailers specializing in hoverboards or batteries
- General shopping sites like Amazon
Avoid no-name knockoff batteries that may not meet safety and performance standards.
Swapping the old battery with an equivalent new battery that fits your model can often be done with just a screwdriver. Take care not to damage any internal connections during installation.
3. Charging Port Replacement
If the charging port itself is damaged, you will need to replace it. This requires de-soldering work that is advanced repair for most owners.
Those with expertise soldering and disassembling electronics can source a replacement charging port and attempt this repair. Otherwise, seek out professional repair services.
4. Internal Wiring and Logic Board Repair
Any issues with internal wiring, soldered joints, or logic board damage should be addressed by an experienced repair technician. They can diagnose issues and perform the necessary soldering and replacements.
Attempting internal electrical repairs without proper skill risks further device damage and is not recommended. Leave it to the experts instead.
5. Hoverboard Replacement
For those with defective units still under warranty, contact the manufacturer about a replacement. Most warranties cover up to one year for manufacturing defects.
Check whether your model has had any recent recalls or extended warranties related to charging. Provide proof of purchase and details of the charging issues you are experiencing.
If they confirm a defect covered under warranty, you can often receive a brand new replacement hoverboard free of charge. This is the ideal resolution if an issue clearly stems from a factory flaw.
Even out of warranty, the manufacturer may be able to offer you a discounted refurbished replacement if the issue is widespread for your model.
Best Practices to Avoid Charging Problems
While charging problems are common even with normal wear and tear, following these best practices can help minimize issues:
1. Use Only Manufacturer Approved Chargers
Avoid knockoff replacement chargers that don’t meet the hoverboard’s power needs. Using lower quality or incompatible chargers is a common cause of problems.
2. Maintain Battery Properly
Fully charge batteries before first use. Avoid completely draining batteries which strains them. Store batteries at moderate room temperatures when not in use.
3. Inspect Charging Components
Periodically check charging ports, cables, and connectors for damage so small issues don’t become bigger problems.
4. Keep Batteries Away From Heat
Don’t leave batteries charging unattended for excessively long periods. Don’t charge near heat sources which degrades lifespans.
5. Recalibrate Periodically
Recalibration can optimize hoverboard power delivery and help avoid potential electrical issues. Perform every few months.
6. Replace Components Proactively
Consider replacing batteries every 1-2 years and chargers every 3-5 years even if working to avoid imminent failures.
Following these tips will maximize your hoverboard’s charging system health and lifespan. But even well maintained hoverboards will inevitably encounter charging problems after years of use. This guide prepares you to get back up and running when that dreaded time comes.
When to Seek Out Professional Hoverboard Repair?
While many charging problems can be addressed yourself, more complex electrical issues require professional repair skills and tools. Seek help from a specialist when:
- You lack the technical knowledge to diagnose issues in the electrical systems.
- Internal disassembly, soldering, or component replacement is needed. This requires electronics repair experience.
- You want to avoid any risk of electrical shocks or further device damage.
- Your troubleshooting hits a dead end with still no charging possible.
- The hoverboard is still under warranty and needs serviced by an authorized repair center.
Finding a qualified repair technician you can trust is important, as improper repairs can potentially damage the device further or void warranties.
Related posts:
 8 Reasons Why Your Hoverboard Could Be Beeping
  How to Fix a Hoverboard That Won’t Turn Off:Complete Guide
  One Side Of Hoverboard Not Working: Troubleshooting Guide
  How to Charge a Hoverboard Without a Charger(6 Best Method)
  Hoverboard Got Wet? Tips and Steps to Repair Your Hoverboard
  Why Is My Hoverboard Beeping? In-Depth Troubleshooting Guide