Hoverboards, once the stuff of science fiction, have now become a reality. These self-balancing scooters have captured the imagination of tech enthusiasts and thrill-seekers alike. But did you know you can build your own hoverboard? In this in-depth guide, we’ll walk you through the process of how to make a hoverboard step by step, ensuring you understand every aspect of this exciting DIY project.
Table of Contents
What is a Hoverboard?
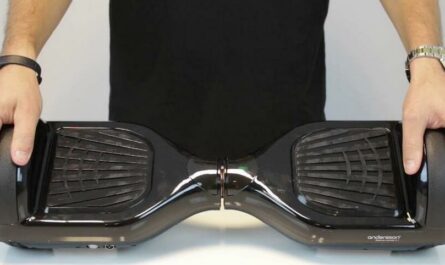
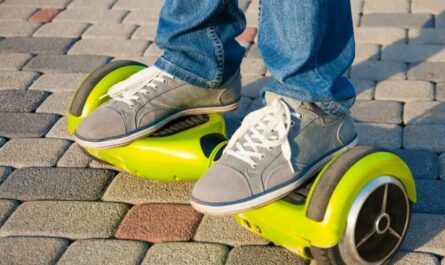
A hoverboard, often called a self-balancing scooter, is a personal transportation device. It consists of two motorized wheels connected to a pair of articulated pads on which the rider places their feet. The rider controls the speed by leaning forwards or backwards, and direction changes are made by twisting the pads.
Hoverboards have become an increasingly popular mode of transportation in recent years, with many different models on the market. There are several types of hoverboards including traditional hoverboards, off-road hoverboards, and even electric unicycles. Each offers a unique riding experience, but they all operate on the same basic principles.
The Science Behind Hoverboards
Hoverboards operate on the principles of gyroscopic technology and motor speed control. The gyroscopes are sensors that measure the tilt of the hoverboard. As you lean forward, the sensors recognize this change and signal the motors to spin the wheels and maintain balance.
The same principle applies when you lean backward or shift your weight to make turns. This balance is what gives the hoverboard its “hover” effect, even though it’s not actually levitating.
Why Build Your Own Hoverboard?
There are several reasons to consider building your own hoverboard.
Firstly, building your own hoverboard allows for a high level of customization. You can tailor the design to your preferences, ensuring your ride is as comfortable and efficient as possible. You can even add unique features that aren’t typically found on commercially available models.
Secondly, the DIY approach gives you invaluable hands-on experience with the technology behind this innovative mode of transportation. You can learn a lot about the principles of gyroscopic technology and electric motor control, which are widely used in many other types of electronic devices.
Finally, there’s a sense of satisfaction and accomplishment that comes from building something with your own two hands. It gives you a unique story to tell and a personal connection to your hoverboard that you wouldn’t have with a store-bought model.
Tools and Materials Needed
Before you start building your hoverboard, you’ll need to gather some essential tools and materials.
Essential Tools
Building a hoverboard requires a specific set of tools. These include:
- Screwdriver set: For assembling and tightening various parts.
- Soldering iron: For creating secure electrical connections.
- Multimeter: For testing and troubleshooting electrical components.
- Wire strippers: For preparing electrical wires for connection.
- Pliers: For gripping and manipulating small parts.
Each tool plays a vital role in assembling and securing the components of your hoverboard.
Materials for the Hoverboard
To build your hoverboard, you’ll need:
- Two gyroscopes: These are the sensors that detect tilt and movement.
- Two brushless electric motors: These provide the power to move the hoverboard.
- A control circuit: This is the “brain” of the hoverboard that controls the speed of the motors based on the input from the gyroscopes and pressure pads.
- Two pressure pads: These detect the pressure from your feet and help control the movement and balance of the hoverboard.
- A frame: This is the body of the hoverboard that holds all the components together.
- A battery pack: This provides the electric power needed to run the motors.
- Two wheels: These are what allow the hoverboard to move.
You can find these materials online or in electronics stores. Be sure to choose high-quality components to ensure the longevity and safety of your hoverboard.
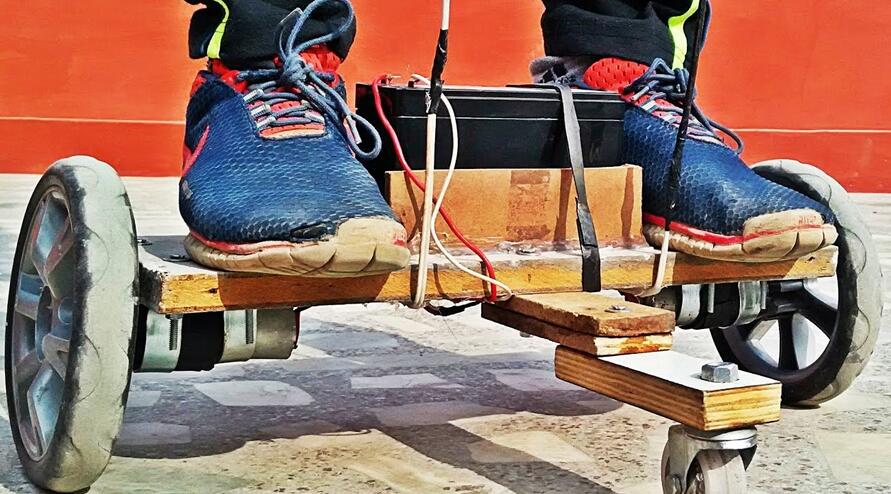
Step by Step Guide to Making a Hoverboard
Now that you have a basic understanding of what a hoverboard is and what you’ll need to build one, let’s go through the process step by step.
Designing Your Hoverboard
The first step in building a hoverboard is to design it. This is where you can let your creativity shine. Consider your weight, the terrain you’ll be riding on, and your personal style. Do you want a sleek and futuristic design, or something more rugged and off-road? Sketch out your design on paper or use CAD software for a more precise plan.
Constructing the Hoverboard
Once you have a design in mind, it’s time to start the construction process. Here is a simple step-by-step guide to building your hoverboard:
- Fix the motors to the frame: Attach the motors to your frame, ensuring they are securely fastened. The motors should be aligned with where the wheels will be installed.
- Install the wheels: Attach the wheels tothe motors. Ensure they spin freely and are securely fastened.
- Mount the gyroscopes and pressure pads: Install the gyroscopes and pressure pads on each side of the frame. They need to be positioned under where your feet will be.
- Connect the control circuit: Connect the control circuit to the motors, battery, gyroscopes, and pressure pads. Use a soldering iron for secure connections. Ensure the connections are insulated to avoid short-circuiting.
- Install the battery: Mount the battery to the frame in a position that doesn’t interfere with the other components. Connect it to the control circuit.
- Test the hoverboard: Once everything is connected, test the hoverboard. Stand on the pressure pads and lean forward. The wheels should start spinning. If they don’t, use a multimeter to troubleshoot the electrical connections.
Safety Considerations
Building a hoverboard is an exciting project, but it’s important to remember that safety should never be compromised. Here are some safety considerations to keep in mind:
- Battery safety: It’s crucial to use a high-quality battery and charger. Low-quality batteries can overheat and cause fires. Make sure to monitor the charging process and never leave a charging battery unattended.
- Wheel safety: Ensure the wheels are securely attached and check them regularly for wear and tear. Replace them if necessary.
- Regular maintenance: Like any vehicle, a hoverboard requires regular maintenance. Regularly check all the components and connections for wear or damage and replace as necessary.
- Helmet and pads: Always wear a helmet and protective pads when riding your hoverboard to prevent injuries in case of falls or crashes.
Enhancing Your Hoverboard Experience
After you’ve successfully built your hoverboard, there are several ways to enhance your riding experience.
Customizing Your Hoverboard
One of the great things about building your own hoverboard is the ability to customize it to your liking. You can paint it any color you like, add LED lights for nighttime riding, or even attach a Bluetooth speaker to enjoy music while you ride.
Learning Advanced Tricks
Once you’re comfortable riding your hoverboard, you may want to learn some advanced tricks. These can include spins, jumps, and even flips. Be sure to practice in a safe environment and always wear protective gear.
Participating in Hoverboard Communities
Joining a community of hoverboard enthusiasts can be a great way to learn new tricks, get tips for maintaining your hoverboard, and even participate in hoverboard events or races. There are many online forums and social media groups where hoverboard enthusiasts gather.
Conclusion
Building your own hoverboard can be a rewarding and educational process. It allows you to understand the technology behind these popular devices and customize one to your specific needs and preferences. With the right tools, materials, and a good dose of patience and creativity, you can construct a functioning hoverboard that provides a unique and personalized riding experience. Remember to always prioritize safety and enjoy the ride!
Related posts:
 Lamborghini vs Regular Hoverboard: 10 Differences
  How to Choose a Hoverboard for Beginners: Selecting Perfect Ride
 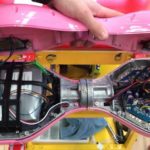 Hoverboard charging time: Everything you need to know
  How to Connect Bluetooth to a Hoverboard: A Step-by-Step Guide
 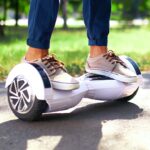 How to Balance on a Hoverboard Step By Step
  Ultimate Guide to Hoverboard Calibration: Reset and Balance