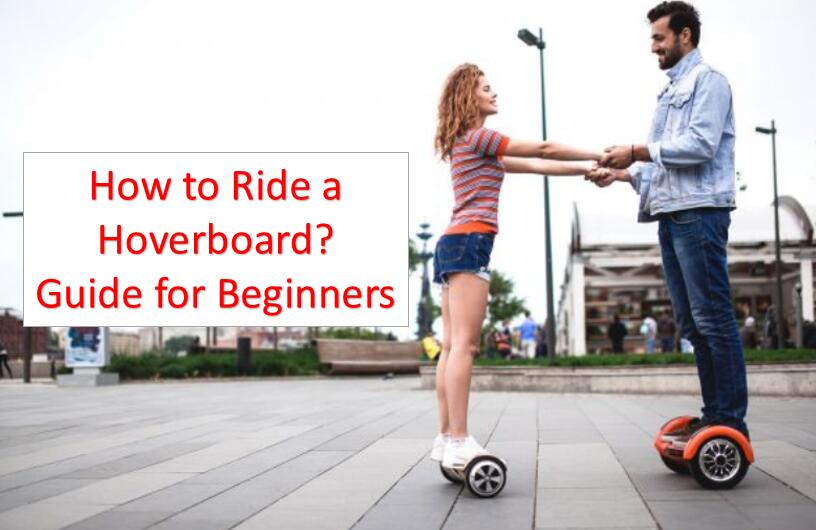
Hoverboards have become a popular mode of transportation for both kids and adults. These self-balancing scooters are fun and easy to use, but if you’re a beginner, you may be wondering how to ride a hoverboard. The good news is that riding a hoverboard is not difficult, and with a little practice, you’ll be gliding around in no time.
In this article, we will provide you with a comprehensive guide on how to ride a hoverboard. We will cover everything from getting started to mastering basic techniques. Whether you’re a beginner or an experienced rider, this guide will help you ride your hoverboard with confidence.
Table of Contents
How to Choose the Best Hoverboard for Beginners?
Before you start riding a hoverboard, it’s important to choose the right one. There are many different models and brands available. Here are some factors to consider when making your selection:
1. Safety Features
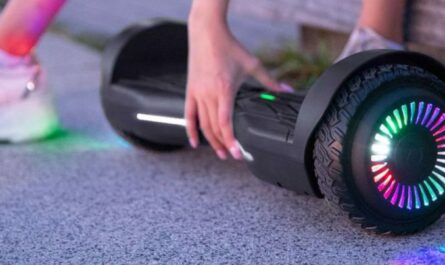
Safety should be a top priority, especially for beginners. Look for hoverboards with features such as non-slip foot pads, LED lights for visibility, and fender bumpers for added protection. Additionally, check for UL2272 certification, which ensures the hoverboard meets safety standards.
2. Size and Weight Capacity
Consider the size and weight capacity of the hoverboard. Beginners may find it easier to handle a smaller and lighter hoverboard. Ensure that the weight capacity of the hoverboard can accommodate the rider’s weight.
3. Stability and Balance
Look for hoverboards with a good balance and stability system. This is crucial for beginners to feel secure and maintain their balance while riding. Features like self-balancing technology or an advanced gyroscopic system can assist with stability.
4. Speed and Riding Modes
Beginners often prefer hoverboards with lower maximum speeds to start with. Look for hoverboards that offer different riding modes, including a beginner or learning mode. This can reduce the maximum speed and make it easier to control.
5. Battery Life and Charging Time
Consider the battery life and charging time of the hoverboard. Longer battery life means more riding time, while a shorter charging time allows for quicker recharges. Aim for a hoverboard with a battery life of at least 1-2 hours.
6. User Reviews and Reputation
Read customer reviews and check the reputation of the hoverboard brand or manufacturer. This will give you insights into the experiences of other users and help you determine the reliability and quality of the hoverboard.
7. Price and Budget
Set a budget for your hoverboard purchase and compare prices among different brands. While it’s essential to find a hoverboard within your budget, prioritize quality and safety over a low price.
8. Warranty and Customer Support
Check the warranty offered by the manufacturer and the availability of customer support. A reliable warranty and responsive customer support can be beneficial if you encounter any issues with your hoverboard.
Safety Precautions You Should Know
When it comes to riding a hoverboard, safety should always be your top priority. Here are some safety precautions you should take before embarking on a hoverboard adventure.
1. Wearing the Right Gear
Wearing the right gear is paramount when riding a hoverboard. This includes a certified helmet, elbow pads, wrist guards, and knee pads. A helmet is especially important as it protects your head from injury in case of a fall or collision.
Make sure the helmet fits snugly and is secured properly. Elbow pads, wrist guards, and knee pads protect your joints from impact in case of a fall or collision. They also help prevent scrapes and bruises.
2. Understanding Your Hoverboard
Before you start riding your hoverboard, it is important to understand how it works. Read the user manual carefully and familiarize yourself with the controls. Make sure the hoverboard is fully charged and in good condition. Inspect the hoverboard for any damage or loose parts before riding it.
It is also important to be aware of the risks associated with riding a hoverboard. Always ride on a flat, smooth surface and avoid steep inclines or declines. Do not ride your hoverboard in traffic or crowded areas. Keep a safe distance from people and objects. Do not attempt tricks or stunts unless you are an experienced rider.

How to Ride a Hoverboard: Getting Started
If you’re new to hoverboarding, it’s important to start with the basics. Before you attempt to ride your hoverboard, you should familiarize yourself with its anatomy and controls. Here are some steps to get you started:
1. Mounting the Hoverboard
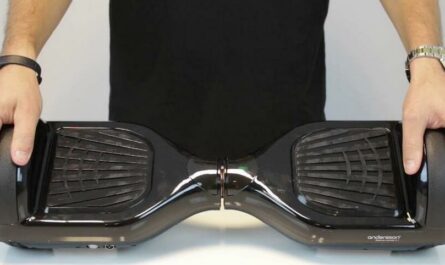
When getting on a hoverboard, you should start by placing it on a flat and even surface. Make sure the hoverboard is turned off before you mount it. To get on the hoverboard, place one foot on one of the footpads, then step onto the other footpad with your other foot. Keep your feet parallel to each other and your body facing forward.
2. Finding Balance
Once you’re on the hoverboard, it’s important to find your balance. Start by keeping your feet flat on the footpads and your body centered over the hoverboard. Keep your knees slightly bent and your core engaged to help maintain your balance.
Learning how to balance on a hoverboard takes practice. If you’re having trouble, start by using the hoverboard in learning mode, which limits the speed and acceleration of the hoverboard. You can also calibrate the hoverboard to make it easier to balance.
3. Control
To start moving on the hoverboard, shift your weight forward or backward. To turn, lean your body to one side or the other. Keep your movements smooth and controlled to maintain your balance.
Remember to keep your posture upright and your head facing forward. Avoid looking down at the footpads, as this can throw off your balance. By following these steps, you can start learning how to ride a hoverboard with confidence and control. Remember to take it slow and practice regularly to improve your skills.
How to Master the Ride?
Once you have learned how to stand on your hoverboard, it’s time to start moving. In this section, we will cover the basics of how to ride a hoverboard, including moving forward and backward, turning, and stopping.
1. Moving Forward and Backward
To move forward on your hoverboard, you will need to lean forward slightly. The more you lean forward, the faster you will go. If you want to slow down or stop, you can lean backward. It’s important to start slowly and gradually increase your speed as you become more comfortable on your hoverboard.
To move backward on your hoverboard, you will need to lean backward slightly. The more you lean backward, the faster you will go in reverse. If you want to slow down or stop, you can lean forward.
2. Turning and Stopping
To turn right on your hoverboard, you will need to shift your weight to your left foot. This will cause the right side of your hoverboard to move forward, turning you to the right. To turn left, shift your weight to your right foot.
To stop your hoverboard, you will need to lean back slightly until you come to a complete stop. It’s important to practice stopping at various speeds to get a feel for how your hoverboard handles.

Advanced Techniques
Once you have mastered the basics of riding a hoverboard, you can move on to more advanced techniques to impress your friends and take your skills to the next level. In this section, we will cover two main areas: performing tricks and riding on different terrains.
1. Performing Tricks
Performing tricks on a hoverboard can be a lot of fun, but it is important to remember to always wear proper safety gear and attempt tricks only after you have mastered the basic riding techniques. Here are a few tricks you can try:
- 360 Spin: To execute a 360 spin, start by riding forward and then shift your weight to one side while turning your shoulders in the opposite direction. This will cause the hoverboard to spin around in a complete circle. Make sure to keep your balance and stay centered over the board.
- Jumping: With practice, you can learn to jump your hoverboard over small obstacles like curbs or ramps. Start by riding toward the obstacle and then crouching down as you approach it. As you reach the obstacle, push off with your feet and jump over it, landing back on the board.
- Skateboard Tricks: Many skateboard tricks can be adapted to work on a hoverboard. Try practicing kickflips, heelflips, or even ollies to add some variety to your riding.
2. Riding on Different Terrains
One of the great things about hoverboards is that they can be ridden on a variety of different terrains. Here are a few tips for riding on different surfaces:
- Slopes: Riding up and down hills or slopes can be challenging, but with practice, you can master it. When riding up a slope, lean forward and keep your weight centered over the board. When riding down a slope, lean back slightly to maintain your balance and control your speed.
- Grass and Dirt: Riding on grass or dirt can be tricky because the hoverboard’s wheels can sink into the soft ground. To ride on these surfaces, keep your weight centered and try to maintain a consistent speed.
- Spinning: You can also try spinning your hoverboard in place. To do this, start by standing still and then shift your weight to one side while turning your shoulders in the opposite direction. This will cause the board to spin around in a circle.
By practicing these techniques and experimenting with different tricks and terrains, you can become a skilled hoverboard rider.
Maintenance and Troubleshooting
Hoverboards require regular maintenance to ensure that they run smoothly and safely. In this section, we will cover some basic maintenance tips and troubleshooting techniques that you can use to keep your hoverboard in top condition.
1. Battery and Charging
The battery is one of the most important components of your hoverboard. Without a fully charged battery, your hoverboard won’t be able to function properly. It’s important to charge your hoverboard regularly to ensure that the battery remains in good condition.
To charge your hoverboard, simply plug it into a power outlet using the charger that came with your hoverboard. It’s important to use the correct charger, as using the wrong charger can damage your hoverboard’s battery.
When charging your hoverboard, make sure to keep an eye on the battery level. Most hoverboards have a battery indicator light that will let you know when the battery is fully charged. Once the battery is fully charged, unplug your hoverboard from the charger to avoid overcharging the battery.
2. Calibration and Tech Issues
Hoverboards use a gyroscope and sensors to maintain balance and stability. If these components become misaligned or damaged, your hoverboard may not function properly. Calibration is the process of resetting your hoverboard’s sensors and gyroscope to ensure that they are working correctly.
To calibrate your hoverboard, follow the instructions in your hoverboard’s manual. The process may vary depending on the model of your hoverboard but generally involves turning off your hoverboard, placing it on a flat surface, and following a series of steps to reset the sensors and gyroscope.
If you are experiencing technical issues with your hoverboard, such as malfunctioning internal circuits or balance sensors, it may be necessary to seek professional assistance. Avoid attempting to repair your hoverboard yourself, as this can be dangerous and may cause further damage to your hoverboard.
Regular maintenance and calibration can help ensure that your hoverboard runs smoothly and safely. If you experience any technical issues with your hoverboard, seek professional assistance to avoid causing further damage.
Conclusion
Learning how to ride a hoverboard can be an exciting and fun experience for beginners. By following a comprehensive guide and taking the necessary precautions, beginners can quickly enjoy the ride. Here are the key takeaways:
- Safety First: Always prioritize safety by wearing appropriate protective gear.
- Start in a Controlled Environment: Begin your hoverboard journey in a flat, open area with minimal obstacles.
- Find Your Balance: Mastering balance is crucial when riding a hoverboard. Stand with your feet shoulder-width apart and distribute your weight evenly.
- Practice, Practice, Practice: Like any skill, riding a hoverboard requires practice. Start by moving slowly and gradually increase your speed as you become more comfortable.
- Be Mindful of Your Surroundings: Always be aware of your surroundings and ride defensively. Pay attention to pedestrians, cyclists, and vehicles, and give them ample space. Avoid uneven or slippery surfaces, and be cautious of obstacles in your path.
- Use Your Body Weight for Control: To control the hoverboard’s movement, lean your body slightly forward to move forward and lean backward to slow down or stop.
- Stay Calm and Confident: It’s natural to feel a bit apprehensive at first, but maintaining a calm and confident mindset is key. Trust your abilities, stay focused, and don’t be afraid to take breaks if needed.
Related posts:
 How Do You Make a Hoverboard Step By Step
  How to Choose a Hoverboard for Beginners: Selecting Perfect Ride
 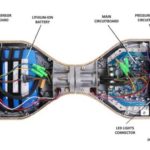 What Does a Hoverboard Look Like: Unveiling the Futuristic Ride
  13 Hoverboard Tricks for Every Rider (Easy & Advanced)
  How to Connect Bluetooth to a Hoverboard: A Step-by-Step Guide
  How to Reset or Calibrate a Hoverboard Step by Step